> ## Documentation Index
> Fetch the complete documentation index at: https://beta-guide.daro.so/llms.txt
> Use this file to discover all available pages before exploring further.
# 배너 & MREC 광고
> DARO Flutter SDK를 통해 배너와 MREC 광고를 구현하는 방법을 알아봅니다.
## 배너 & MREC 형태 소개
### 배너 광고
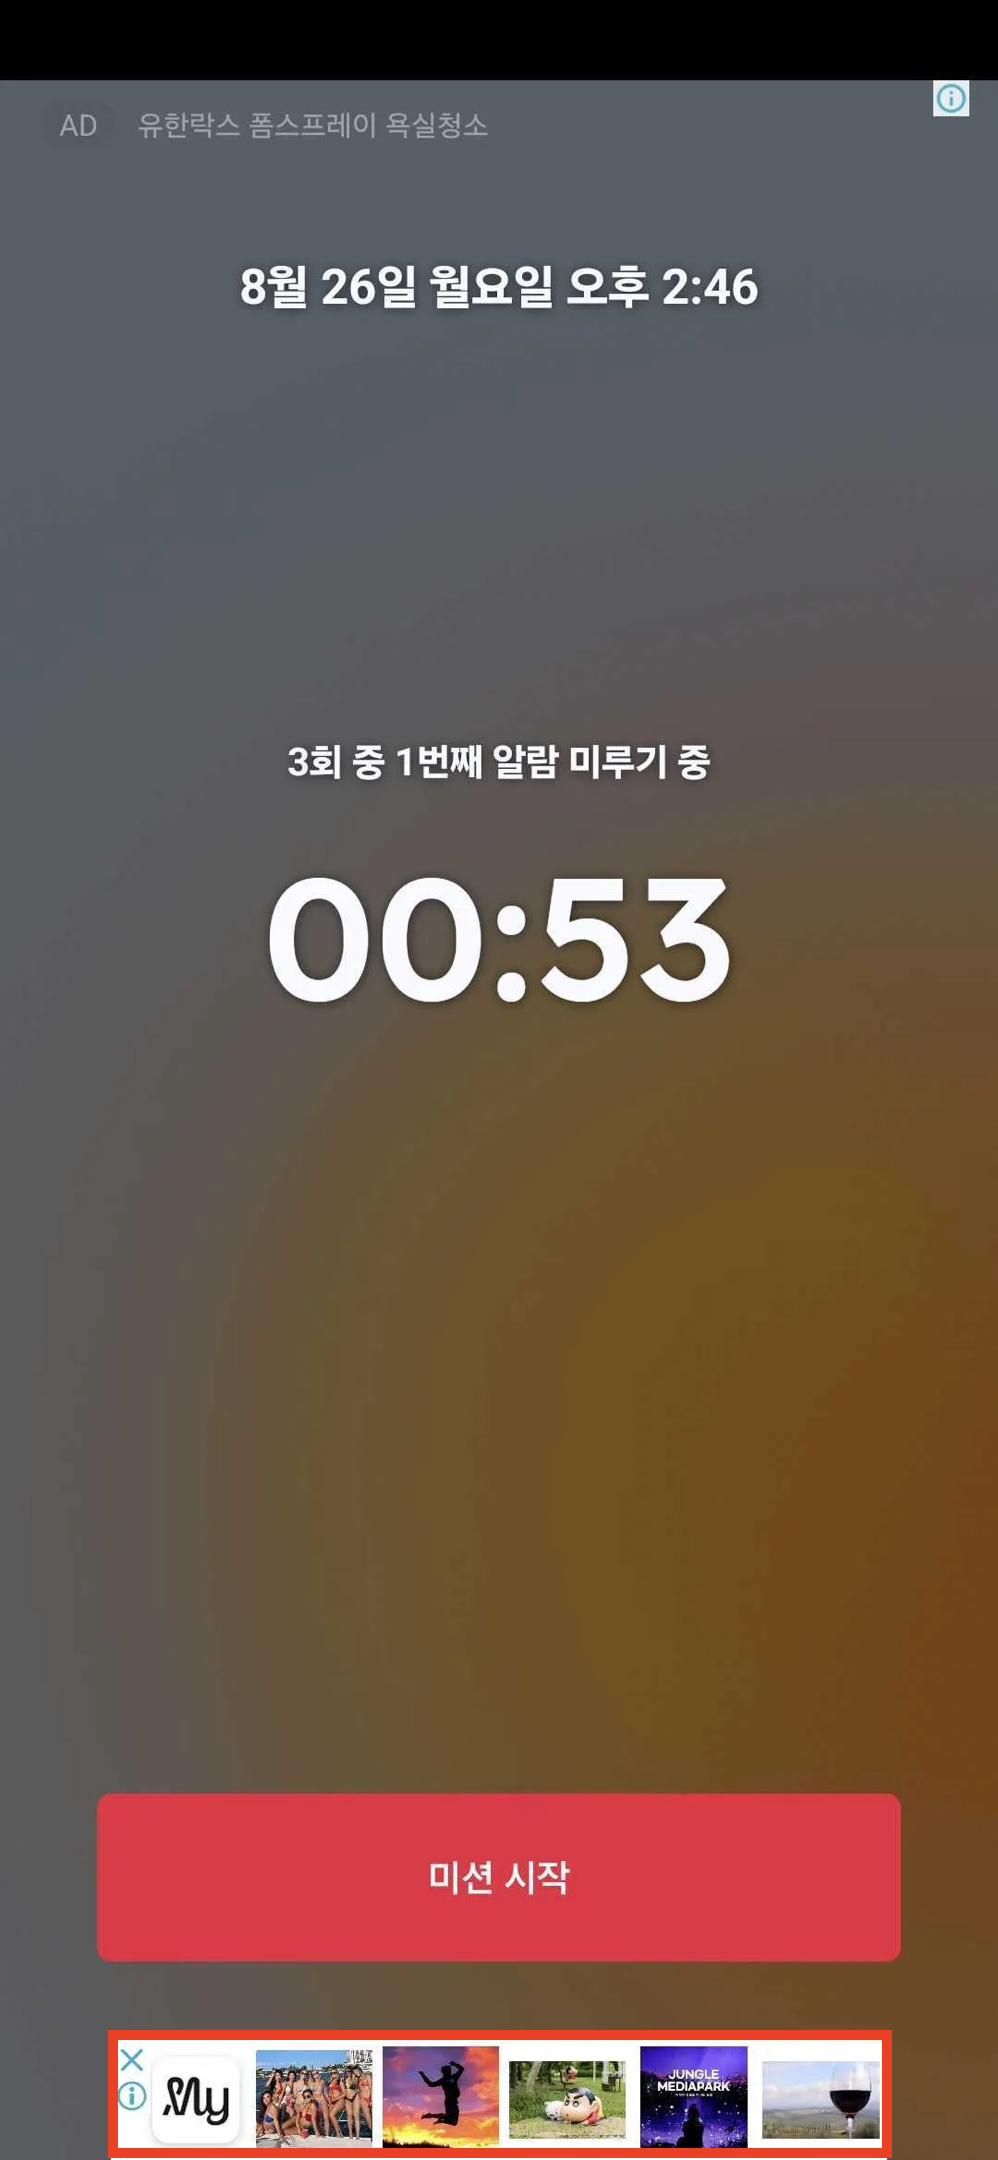
* 앱 레이아웃의 일부를 차지하는 직사각형 광고 형태로 보편적으로 사용됩니다.
* 대부분의 광고 디맨드가 지원하는 형태인 320x50 사이즈를 사용합니다.
 ### MREC 광고
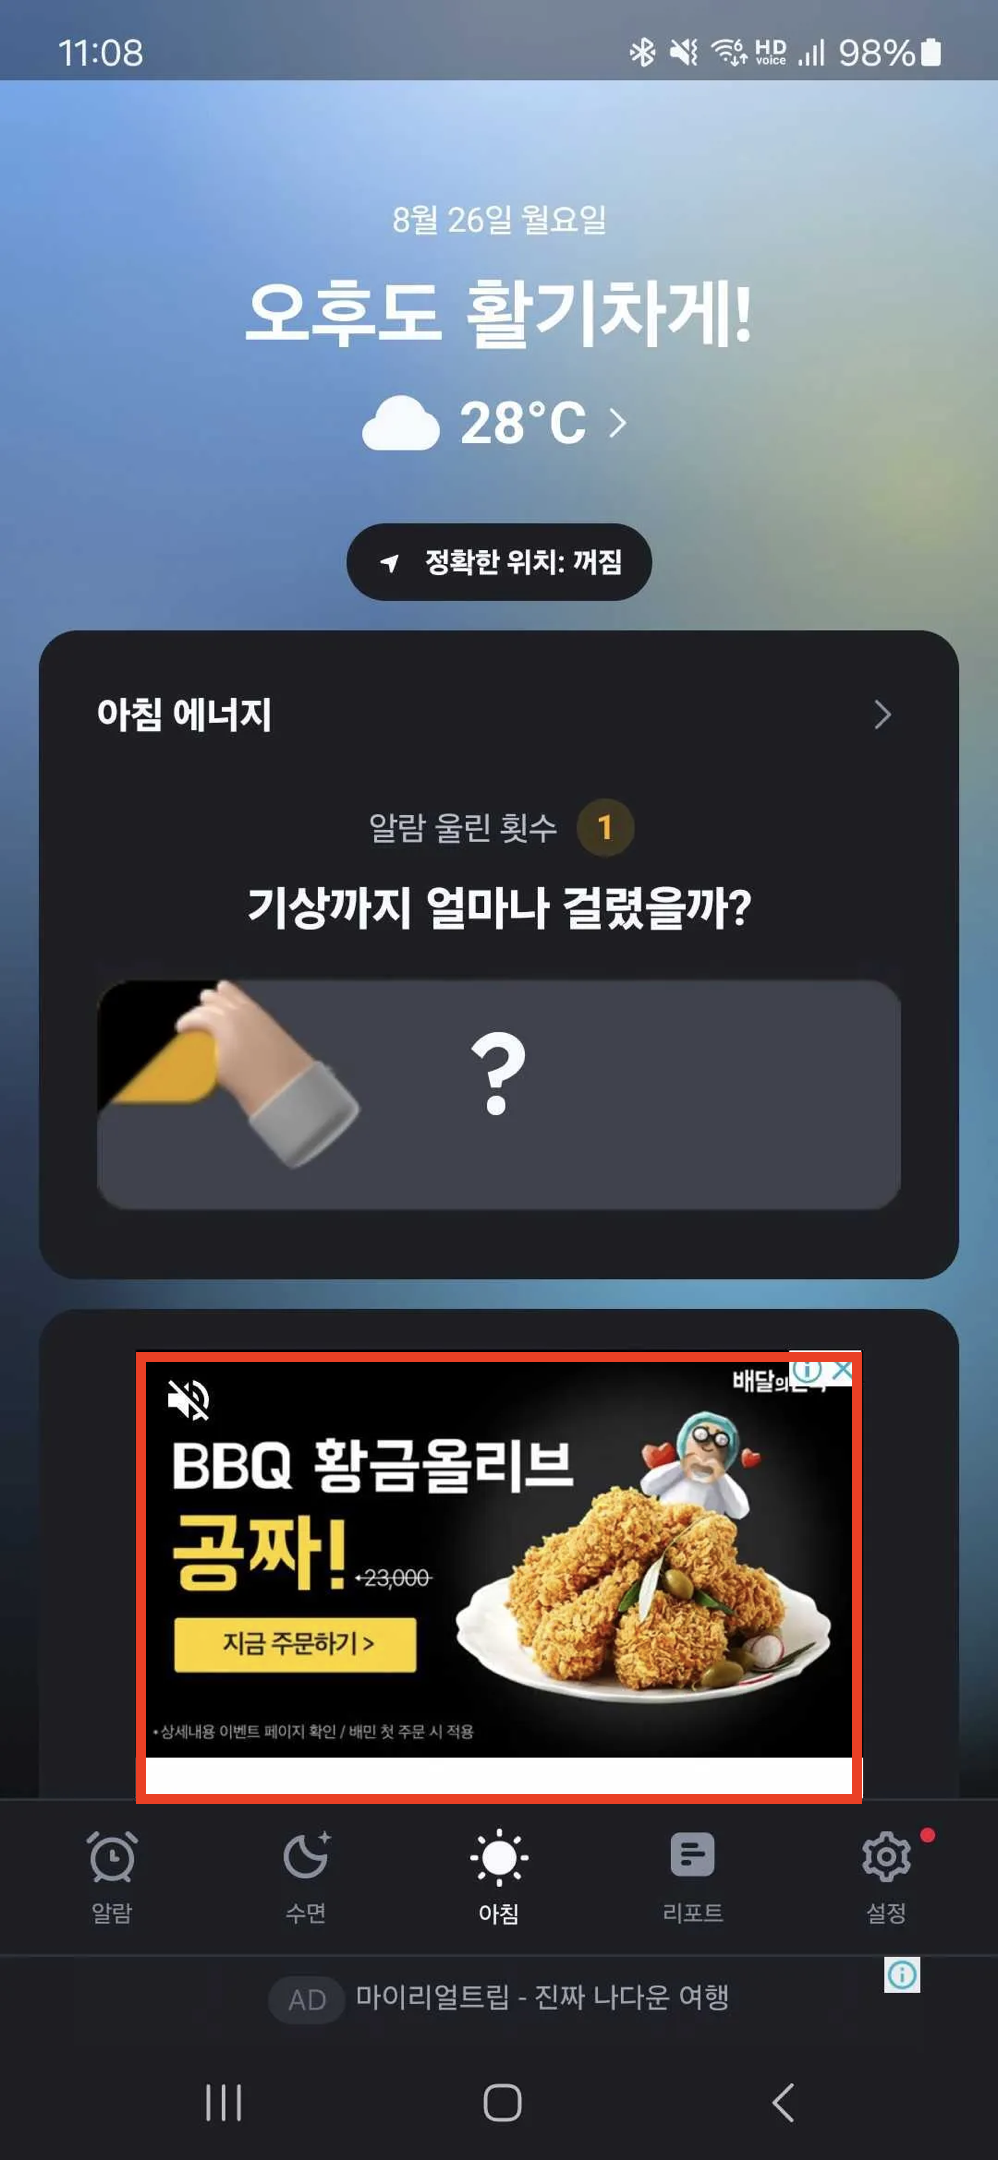
* 300x250 의 사이즈를 MREC으로 구분하여 부릅니다.
* 전반적으로 배너와 동일한 특성을 가집니다.
### MREC 광고
* 300x250 의 사이즈를 MREC으로 구분하여 부릅니다.
* 전반적으로 배너와 동일한 특성을 가집니다.
 ***
## 배너/MREC 광고 구현하기
배너 광고는 **Ad 객체 생성 → 로드 → 위젯 배치 → 해제**의 단계로 구현합니다.
```dart theme={null}
import 'package:daro_flutter/daro_flutter.dart';
```
### 1. Ad 객체 생성
`DaroBannerAd` 객체를 생성하고 콜백을 설정합니다.
```dart 배너 (320x50) theme={null}
final bannerAd = DaroBannerAd(
adUnitId: '{YOUR_AD_UNIT_ID}',
size: DaroBannerSize.banner, // 320x50
onAdLoaded: (adInfo) {
print('Banner ad loaded: ${adInfo.adUnitId}');
setState(() {
_isAdLoaded = true;
});
},
onAdFailedToLoad: (error) {
print('Banner ad failed to load: ${error.message}');
bannerAd.dispose();
},
onAdClicked: (adInfo) {
print('Banner ad clicked');
},
onAdImpression: (adInfo) {
print('Banner ad impression');
},
);
```
```dart MREC (300x250) theme={null}
final mrecAd = DaroBannerAd(
adUnitId: '{YOUR_AD_UNIT_ID}',
size: DaroBannerSize.mrec, // 300x250
onAdLoaded: (adInfo) {
print('MREC ad loaded: ${adInfo.adUnitId}');
setState(() {
_isAdLoaded = true;
});
},
onAdFailedToLoad: (error) {
print('MREC ad failed to load: ${error.message}');
mrecAd.dispose();
},
onAdClicked: (adInfo) {
print('MREC ad clicked');
},
onAdImpression: (adInfo) {
print('MREC ad impression');
},
);
```
### 2. 광고 로드
```dart theme={null}
bannerAd.load();
```
### 3. 위젯 배치
`onAdLoaded` 콜백이 호출된 후 `DaroBannerAdWidget`을 위젯 트리에 배치합니다.
```dart theme={null}
@override
Widget build(BuildContext context) {
return Column(
children: [
// ... 다른 위젯들
if (_isAdLoaded)
DaroBannerAdWidget(ad: bannerAd),
],
);
}
```
`ad.load()`를 호출하기 전에 `DaroBannerAdWidget`을 위젯 트리에 배치하면 `FlutterError`가 발생합니다. 반드시 `onAdLoaded` 콜백 후에 위젯을 배치하세요.
### 4. 리소스 해제
페이지를 벗어나거나 광고가 더 이상 필요하지 않을 때 `dispose()`를 호출하여 리소스를 정리합니다.
```dart theme={null}
@override
void dispose() {
bannerAd.dispose();
super.dispose();
}
```
### 콜백 설명
| 콜백 | 설명 |
| ------------------ | ----------------------- |
| `onAdLoaded` | 광고가 성공적으로 로드되었을 때 호출됩니다 |
| `onAdFailedToLoad` | 광고 로드에 실패했을 때 호출됩니다 |
| `onAdClicked` | 사용자가 광고를 클릭했을 때 호출됩니다 |
| `onAdImpression` | 광고 노출이 기록되었을 때 호출됩니다 |
***
## 배너/MREC 광고 구현하기
배너 광고는 **Ad 객체 생성 → 로드 → 위젯 배치 → 해제**의 단계로 구현합니다.
```dart theme={null}
import 'package:daro_flutter/daro_flutter.dart';
```
### 1. Ad 객체 생성
`DaroBannerAd` 객체를 생성하고 콜백을 설정합니다.
```dart 배너 (320x50) theme={null}
final bannerAd = DaroBannerAd(
adUnitId: '{YOUR_AD_UNIT_ID}',
size: DaroBannerSize.banner, // 320x50
onAdLoaded: (adInfo) {
print('Banner ad loaded: ${adInfo.adUnitId}');
setState(() {
_isAdLoaded = true;
});
},
onAdFailedToLoad: (error) {
print('Banner ad failed to load: ${error.message}');
bannerAd.dispose();
},
onAdClicked: (adInfo) {
print('Banner ad clicked');
},
onAdImpression: (adInfo) {
print('Banner ad impression');
},
);
```
```dart MREC (300x250) theme={null}
final mrecAd = DaroBannerAd(
adUnitId: '{YOUR_AD_UNIT_ID}',
size: DaroBannerSize.mrec, // 300x250
onAdLoaded: (adInfo) {
print('MREC ad loaded: ${adInfo.adUnitId}');
setState(() {
_isAdLoaded = true;
});
},
onAdFailedToLoad: (error) {
print('MREC ad failed to load: ${error.message}');
mrecAd.dispose();
},
onAdClicked: (adInfo) {
print('MREC ad clicked');
},
onAdImpression: (adInfo) {
print('MREC ad impression');
},
);
```
### 2. 광고 로드
```dart theme={null}
bannerAd.load();
```
### 3. 위젯 배치
`onAdLoaded` 콜백이 호출된 후 `DaroBannerAdWidget`을 위젯 트리에 배치합니다.
```dart theme={null}
@override
Widget build(BuildContext context) {
return Column(
children: [
// ... 다른 위젯들
if (_isAdLoaded)
DaroBannerAdWidget(ad: bannerAd),
],
);
}
```
`ad.load()`를 호출하기 전에 `DaroBannerAdWidget`을 위젯 트리에 배치하면 `FlutterError`가 발생합니다. 반드시 `onAdLoaded` 콜백 후에 위젯을 배치하세요.
### 4. 리소스 해제
페이지를 벗어나거나 광고가 더 이상 필요하지 않을 때 `dispose()`를 호출하여 리소스를 정리합니다.
```dart theme={null}
@override
void dispose() {
bannerAd.dispose();
super.dispose();
}
```
### 콜백 설명
| 콜백 | 설명 |
| ------------------ | ----------------------- |
| `onAdLoaded` | 광고가 성공적으로 로드되었을 때 호출됩니다 |
| `onAdFailedToLoad` | 광고 로드에 실패했을 때 호출됩니다 |
| `onAdClicked` | 사용자가 광고를 클릭했을 때 호출됩니다 |
| `onAdImpression` | 광고 노출이 기록되었을 때 호출됩니다 |